
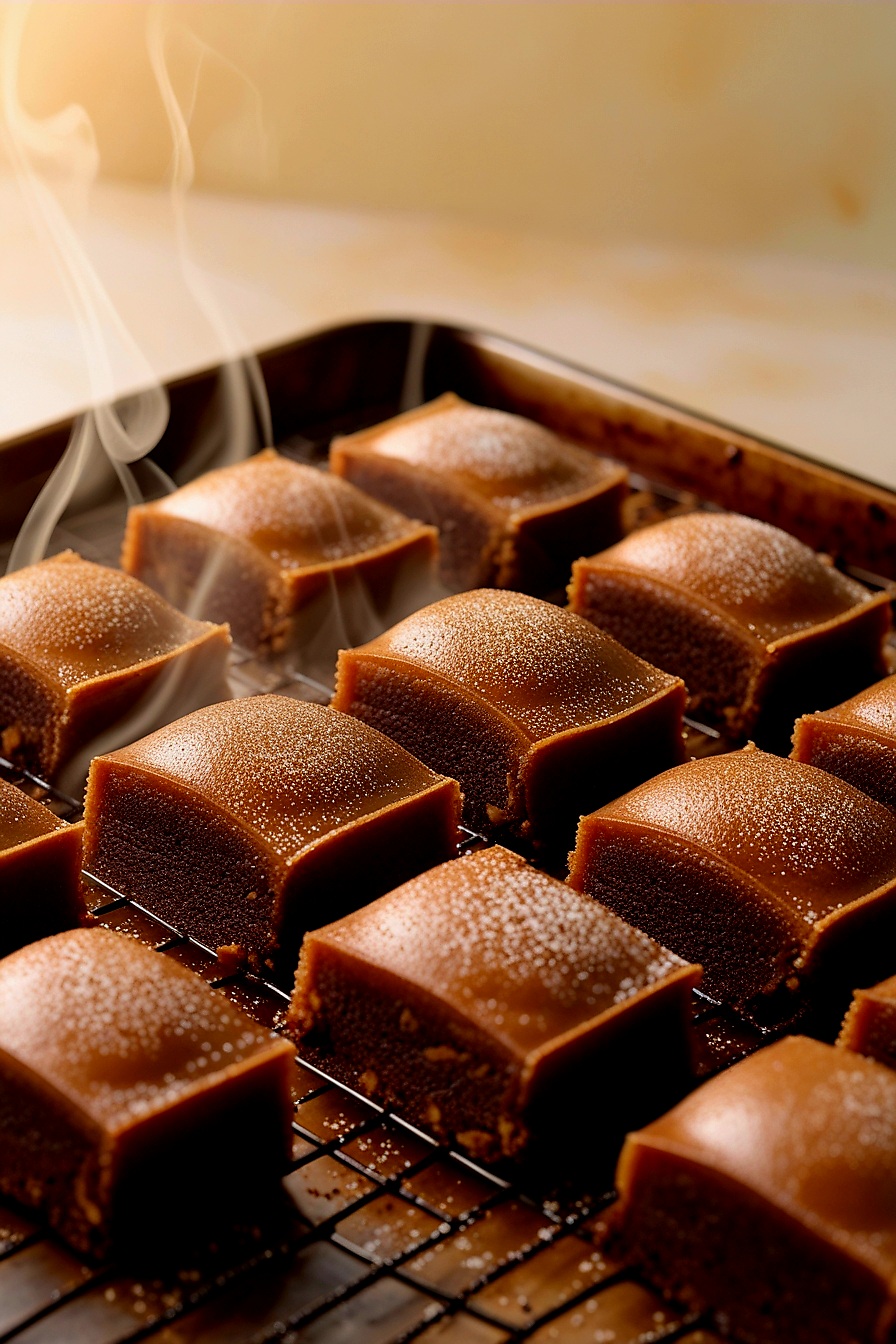
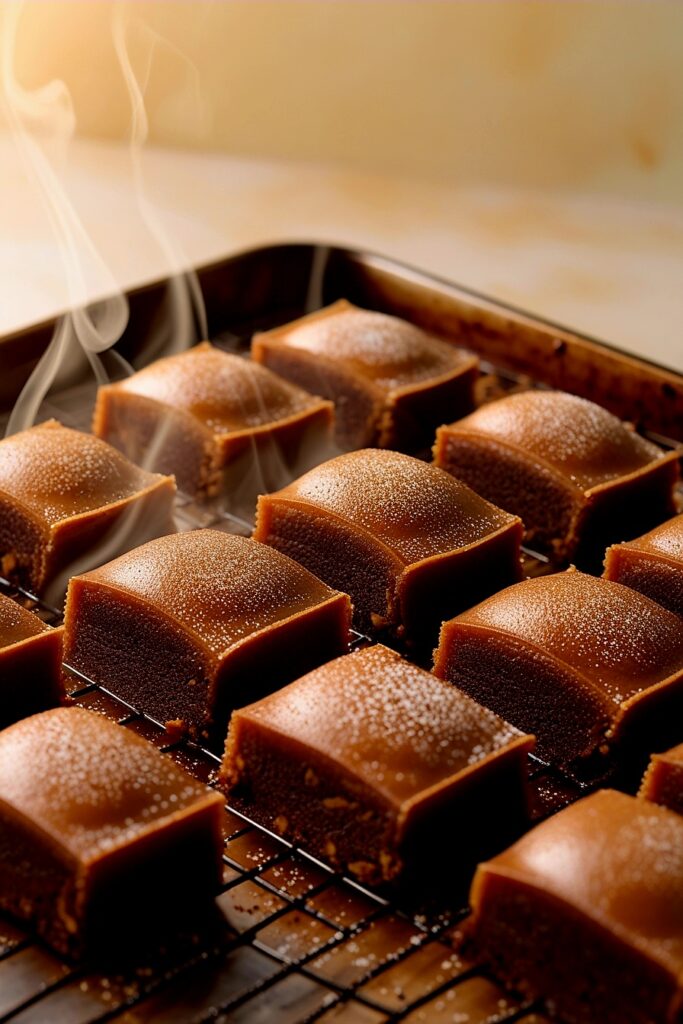
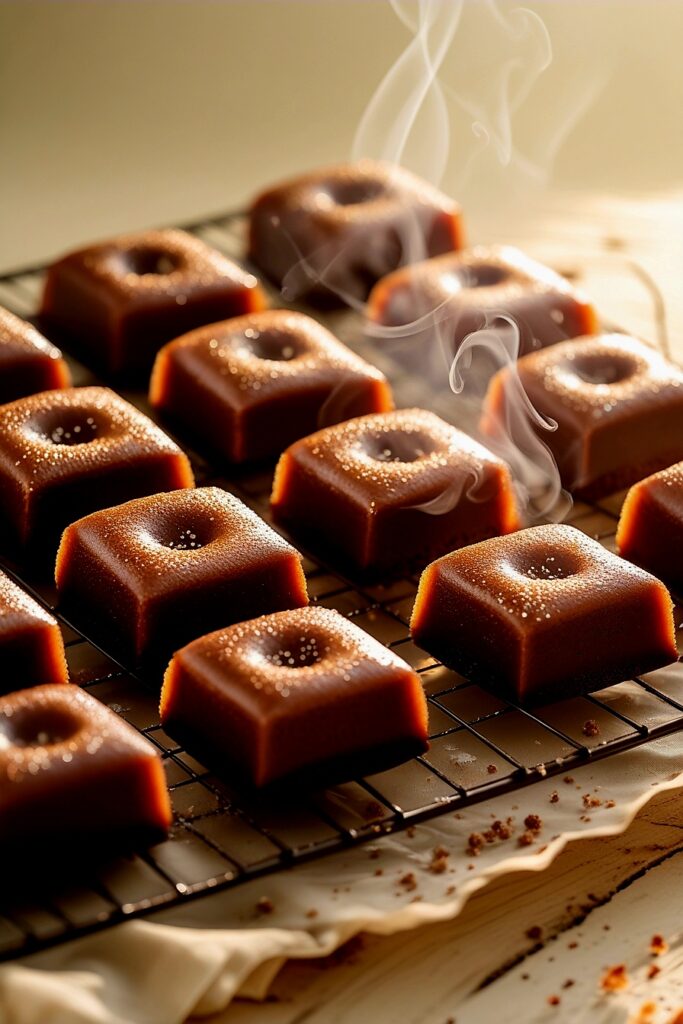
Mochi Brownies
If you’re a fan of chewy mochi and rich chocolate brownies, this recipe is about to blow your mind. Mochi Brownies combine the best of both worlds — the crisp edges and gooey center of a brownie with the soft, stretchy chew of mochi. It’s a dessert mashup you didn’t know you needed, and once you try it, you’ll be making it again and again.
Perfect for when you want something different from the usual dessert routine, these Mochi Brownies are gluten-free, naturally chewy thanks to sweet rice flour (mochiko), and insanely satisfying. Whether you’re baking for a weekend treat, a party, or a cozy night in, this unique dessert is guaranteed to turn heads and please every sweet tooth.
What Are Mochi Brownies?
Mochi Brownies are a twist on the classic brownie recipe that uses glutinous rice flour (also called mochiko flour) instead of regular wheat flour. The result? A chewy, stretchy texture that’s unlike any other dessert. If you’ve ever had mochi ice cream or Japanese daifuku, you know the addicting texture I’m talking about. When you combine that with chocolate? Magic.
Why You’ll Love This Recipe
Incredible Texture – Soft, fudgy, and chewy all in one bite.
Gluten-Free – Perfect for those avoiding wheat.
Simple Ingredients – No fancy techniques or special tools needed.
Make Ahead Friendly – They store beautifully for up to a week.
Customizable – Add-ins like nuts, chocolate chips, or matcha take these to another level.
Key Ingredients You’ll Need
Mochiko Flour: This is the essential ingredient that gives the brownies their signature chew. Don’t substitute with regular rice flour — it must say glutinous rice flour.
Cocoa Powder & Chocolate Chips: For rich chocolate flavor.
Sugar & Butter: Classic brownie essentials.
Eggs: Help bind everything and give a bit of fluff.
Milk or Coconut Milk: To help blend the mochiko into a smooth batter.
Tips for Perfect Mochi Brownies
1. Don’t overbake. You want the edges set but the middle to still be soft — it will firm up as it cools.
2. Cool before slicing. Mochi texture improves after it rests. Let it cool completely before cutting to avoid stickiness.
3. Grease your pan well. Mochi batter can be sticky, so don’t skimp on the butter or non-stick spray.
4. Experiment with add-ins. Try folding in crushed Oreos, walnuts, or swirls of peanut butter.
How to Serve Mochi Brownies
Serve these brownies as-is, or warm them slightly in the microwave for that ultra-gooey middle. They’re also amazing with a scoop of vanilla or matcha ice cream on the side. Dust with cocoa or powdered sugar for extra flair.
Storing & Freezing
Store your Mochi Brownies in an airtight container at room temperature for up to 3 days, or in the fridge for up to a week. They can also be frozen — just wrap tightly and thaw at room temperature or microwave for 20–30 seconds to bring back that chewy texture.
Final Thoughts
Mochi Brownies are one of those unexpectedly delightful desserts that always impress. Whether you’re new to baking with mochiko or already a mochi-lover, these brownies offer a fantastic way to mix tradition with indulgence. They’re perfect for potlucks, gifting, or just treating yourself to something different. Once you take a bite of that chewy chocolate goodness, you’ll know — these brownies are a keeper.
Mochi Brownies

These Mochi Brownies are a rich, chewy twist on traditional brownies—perfect for anyone who loves gooey textures with deep chocolate flavor. Made with glutinous rice flour, they’re naturally gluten-free and have that signature mochi bounce inside with a crisp outer edge.
- 1 cup mochiko flour (glutinous rice flour)
- 1/2 cup unsweetened cocoa powder
- 1 cup granulated sugar
- 2 large eggs
- 1/2 cup unsalted butter (melted)
- 1 cup milk (or coconut milk for dairy-free)
- 1 tsp vanilla extract
- 1/2 tsp baking powder
- 1/4 tsp salt
- 1/2 cup semi-sweet chocolate chips (optional)
- Preheat oven to 350°F (175°C) and grease an 8×8-inch baking pan.
- In a mixing bowl, whisk together mochiko flour, cocoa powder, sugar, baking powder, and salt.
- In a separate bowl, beat the eggs, then mix in melted butter, milk, and vanilla.
- Combine the wet and dry mixtures and stir until smooth. Fold in chocolate chips if using.
- Pour the batter into the greased pan and spread evenly.
- Bake for 35–40 minutes, or until edges are set and a toothpick comes out with just a few moist crumbs.
- Allow to cool fully before slicing into squares. The texture will firm up more once cooled.
Mochiko flour is essential—don’t substitute regular rice flour or all-purpose flour, or you’ll lose the chewy texture.
For a dairy-free version, swap butter with coconut oil and use plant-based milk.
Store leftovers in an airtight container at room temperature for up to 3 days, or refrigerate for up to a week.
These brownies are best enjoyed the next day, once they’ve fully set and developed a chewier bite.